HOW TO FILM A LIVE EVENT…WITHOUT MAKING YOUR CLIENT HATE YOU
Live events are tricky.
Why? because they are not forgiving. I’m not talking about filming a wedding or a social gathering. With those you only need to capture a few minutes of conversation; the rest is random footage that will be edited down into a cute, 3-minute highlight. That’s cake. I’m talking about filming conferences, live concerts, motivational speakers, or corporate trainings. These occasions have no room for take two.
What makes them so tricky?
- Long recording times
Most live speeches are anywhere from 15-30 minutes in length, but some events can run as long as 6-8 hours in total. That’s a lot of data to capture, a lot of batteries to be aware of, and a lot of time for something to go wrong. A lot of VARIABLES!
- Large crowds
Throwing anywhere from 500-10,000 humans into a room always has its issues. But even worse, large crowds today inherently include a large number of electronic devices sending out wifi, Bluetooth, and data signals non-stop. This means that the possibility of interference, power overloads, and knocked over equipment skyrockets. Again VARIABLES!
- Lots of equipment
A live speech asks for a lot of things to be covered all at once: audio, projectors, staging, lighting… and we aren’t even to the cameras yet. Obviously, this all depends on what have you been asked to cover, but even if you are only covering one of the aforementioned tasks, there still has to be communication from you to everyone else. Not to mention most events call for multiple cameras, PA’s, projectors, and so on. What does that mean? You guessed it, more VARIABLES!
So is it possible to successfully film a live event as a small production company?
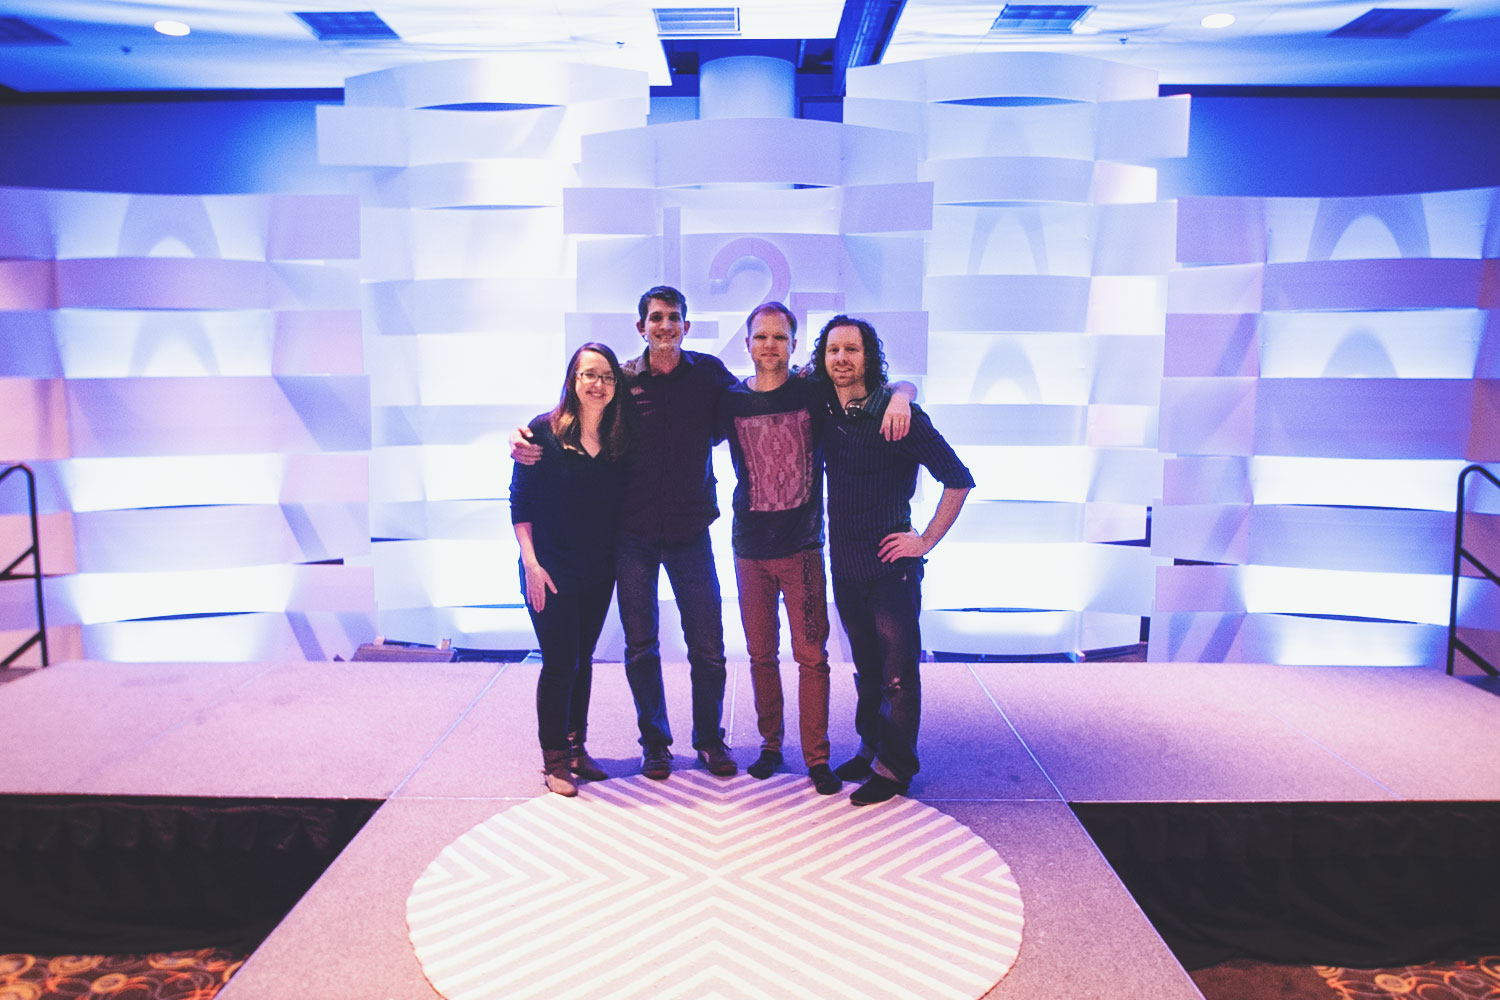
You bet! And it can be a blast, an emotional experience, and even financially beneficial if you cover all these VARIABLES effectively. Here is what we completely screwed up, what we rocked at, and what we learned filming this year’s Learn to Earn Conference 2016.

Lets approach this through principles.
There are pages and pages that can be written about this subject, and even then we would miss something! I would do more harm trying to tell you step by step what to cover, so instead, let’s look at the principles from what we learned – then you can take it from there.
NOTE: if you are looking for information on what equipment to use for a live event please read on, within each principle we discuss the equipment we used and why.
PRINCIPLE ONE: No wireless video, limited wireless audio, and caution on batteries
I love wireless technology. All of our computers heavily support wireless components. On the film-set, we use wireless video and audio all day long. It’s amazing stuff, and it keeps improving. The issue is that wireless technology is heavily effected by the surrounding environment, and for us at this particular event, it was our bane.
For L2E 2016 we wanted to get our cameras in the perfect spot without being in the way of the audiences’ view. To accomplish this we threw our cameras up on two DJI ronin 3-axis stabilizers and threw those up on C-stands 9 feet in the air. The system worked great and allowed us to get some beautiful images without blocking any of the audiences’ view; the issue was in our decision to run the camera monitoring feed wirelessly to our monitoring area 40 feet away. At this monitoring station we had also positioned our powerpoint laptop and it, by our decision, ran its feed wirelessly to the two 7000 lumen eiki projectors (rented through meetingtomorrow.com) and speaker confidence monitor (A TV screen set up in front of the stage facing the presenter so they know what slide is showing on the projectors).
So in theory everything was ready to go, we had tested the system, we mapped out our wireless distances, and were excited to embrace the future. But in practice, when we had around 1000 people present for this highly social media driven conference, we had some major interference issues.
Every 7 minutes or so the video feed to the projectors and the speaker confidence monitor would cut out. Those wireless transmitters then would freak out sending SOS signals trying to find its connecting partner which in turn blasted our wireless video monitoring feed from our cameras. It was a nightmare. The speakers wouldn’t know what slide they were on, the audience was distracted. Then our camera operators and focus pullers would be flying blind solely relying on pure skill to attempt to follow the on-stage speaker as he or she would move around. After 30 seconds to a minute, all the feeds would go live again, and we were back up and running. Well, at least until the next interference hit again in a few minutes.
Thanks to our genius crew, we were able to find a makeshift solution to the issue. We removed all wireless transmitters except for those broadcasting the powerpoint to the projectors. Then we put those transmitters on light-stands 10 feet in the air. We connected our monitors directly to the cameras and had our camera operators and focus pullers sit right next to the camera units. Then, just to add more surety, we moved the presenter computer as close as we could to the projectors. It worked, mostly, and for the remainder of the event we had only 2 additional times that the projector feed temporarily went out.
Our lesson was learned. The next event we filmed, we invested in a bunch of HDMI to SDI transmitters and ran everything through 50ft and 100ft SDI cables back to our switcher, and then out to the projectors. Then all we needed was 3 inch strips of double-sided tape every 4 feet covered with our favorite friend, Gaffe Tape, to keep from tripping the crowd with the cable runs.
We learned to not trust wireless solutions in these types of environments. Wireless audio isn’t effected as much because it is such a light signal, but we keep the audio receivers right next to the stage, then run an XLR cable back to the mixer. Sometimes you have to go wireless; just don’t go 100% wireless.
Batteries can be a huge convenience. When not doing a live event, I love powering our film camera for 6 hours off a single v-mount battery. I love strapping a battery to our LED lights and having a completely mobile light solution in a fast paced film environment. But for live events, forget about it. You can’t risk a battery running out mid-presentation (and possibly corrupting your file). At this event, we had all our cameras, recorders, and laptops plugged directly into power outlets with the battery acting only as a backup. We had to use batteries for the remotes to control the Ronin and the follow focus. In this case, our battery rule is to have double the batteries needed, allowing us to charge one set while the other set is being used.
Technology is great, but only use it where you HAVE to. You don’t want to be trouble-shooting problems while your event is rolling on without you.
“Nay Nay” to wireless video. Use adapters and long runs of SDI cables and you will never need to worry (unless you buy crappy cables). You can keep audio wireless over short distances, use XLR cable for the rest of the run. Hard line power everything that can be plugged in. If batteries are a reqirment, have backups charged or charging.
PRINCIPLE TWO: Eliminate unneeded hassle with digital data; double up on everything
On a film set we have moments where we run out of media but it has never killed the production. We take the card out, offload the media to redundant drives while we use another card, stick it back, double check the footage copied correctly to the computer, then format; We are good to go for our next take. In the live environment, this could kill you…or just make your client really hate you.
The first live event I ever recorded we had rented a bunch of external recorders. 2 of the 3 worked great, but the 3rd external recorder, the Solid State Drive corrupted. After 70 hours of test and trials we were able to successfully recover the data, but without a doubt it was a huge and unnecessary pain. A few months later I rented another type of external recorder and recorded a live event with a single camera. This time we filmed on C-fast cards so that the likely hood of a “collapse” would be greatly reduced. The file got corrupted because of a battery issue. After 65 hours of test and trials we were able to successfully recover the data again, but without a doubt it was still a huge and unnecessary pain.
I don’t know why my experience with external recorders has been so bad but as a result I trust them sparingly for live events. When we planned for L2E 2016 we decided to use cameras that all recorded internally. Even though I love DSLR cameras – especially our goto Sony A7s – with the 30 minute record time limit, DSLR’s are not practical for live events without the dreaded external recorder risk. For the price of a rented DSLR, external recorder, lens, and accessories, we instead rented the Sony FS5. The image is amazing and they record internally to the inexpensive and reliable SD card while allowing you to break the 30 minute record time limit.
On the camera side we had no issue with data, it worked as planned. We had SD cards that could hold the whole conference in ProRes 50mps if we recorded it all in one go. We had planned in breaks where we would stop the recording and start it again just so that everything wasn’t one huge file. For events filmed after this event, we have decided to make sure that we have enough data to run the entire show plus 1/3 just to add on a greater margin of safety, especially when SD cards are so relatively inexpensive.
The team rocked it on the video data side, but where we did run into an issue was with the audio. Our company had been hired to be in charge of the stage setup and the filming. Another company was hired to do the audio. Our only audio responsibility was to record the audio feed out of their mixer onto our Zoom H6. Unfortunately, to my regret, I didn’t give much thought to calculate how much space I needed for recording audio for the entire event. In short, there came a moment where the recorder ran out data. To the credit of the audio guys, they caught our mistake after 10 minutes, threw in a new SD card and saved the moment. But there still was the moment of 10 minutes with no audio. That is where our audio backup came in handy.
We configure one camera with a shotgun mic pointing towards the amplifiers and a secondary XLR input off the mixer. We have found this combo to be very useful. On Channel 2 we have a clean feed directly from the mixer just in case some fruitcake puts too small of an SD card in the audio recorder. Then on Channel 1 we have our own room audio in case the audio mixers forget to turn off the music coming out of the audio mix, we can pick up the crowds reaction to speakers, or if something gets too loud and starts clipping on the mixers side we have an alternative (though you get a bit of room echo, it is much better than nothing). Luckily our audio guys were rocks stars and did a great job giving us a super clean feed, but the backup came in really handy this time as a recovery for that 10 minutes of audio we lost off the main recording due to my error.
Take the time to calculate how much data you will need for audio and video to be able to record the entire event plus 1/3. Don’t plan your event around offloading cards and formatting, its leaves too much room for error. Always have a backup of audio: a room audio from a shotgun mic plugged into the camera, your main recording, and run an extra audio feed out of your mixer into one of your nearest cameras just to be double sure.
PRINCIPLE THREE: Lighting is more important than stage, stage is more important than cameras
Audio without a doubt is the most important part of anything. Amazing audio makes bad footage look good. But when it comes to the visual side we often spend way to much time trying to figure out what cameras we are going to use, and in the end, our film, video, or live event still looks amateur.
Lighting is the key to amazing looking footage. We can light an interview and when done right, get it to look just as amazing filming it with a cell phone as we can with our film cameras. A good camera gives you more options to craft the image, but the lighting is what makes the image worth crafting.
When we were asked by our client to film L2E this year (our second year doing so)we knew we wanted control of the lighting this time. The previous year we only had access to the filming side, and even though we were still able to get the image to look nice, to us it only looked nice half of the time. This was due to the horribly flat lighting that was given. Too often when we think of lighting a set or stage we think of how many lights can we get to the light the whole thing up. I understand this thought process, as we made the same mistake for years. But as we continue to grow we realized more and more lighting isn’t about the lights at all, it’s about the shadows.
We went into L2E 2016 first thinking of how we wanted the shadows to be on our presenters. Through some camera test’s we decided on having one bright diffused light source coming from a fiilex q1000 at 4300 kelvin (A orange-ish Color temperature) and then we would have the background as a contrasting blue to create separation. The single light source would be placed opposite of the cameras to give the subject a beautiful glow around the rim of their face (Acting almost as a backlight) and it would be set 45 degrees off to the side of the subjects front allowing the camera facing half of their face to be in shadow, yet while letting a little light jump over and catch their eye adding depth. It turned out great. As technology has improved, we now would recommend a light like the Dracast 5000 or anything that is around 2K-3K watt equivalent output to get the same effect but at an even lower cost.
The second thing we then focused on was the background. We have grow to learn that location is everything (second to audio and usually combined with lighting). So we crafted our set to fit the feel of the conference. 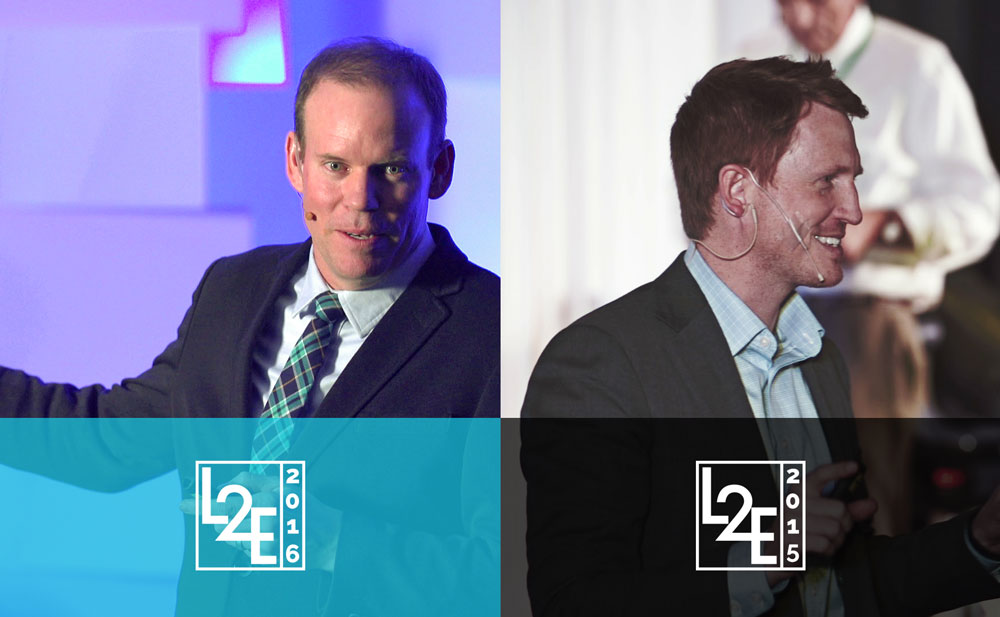 The L2E color is blue, the theme is being big, bold, and creating movement in our own lives and naturally we wanted the background to share this theme and color. We made sure we had distance from the presenters to the background thus creating more visual separation. We hit the background with 5 of these awesome Blizzard Hotstik lights rented from Guitar Center to give the set the blue contrasting color we wanted. We then hit the wall behind the Stage with a slight red-ish hue with 10 Blizzard Hotbox lights to add an additional layer of depth (This layer was more for the audience then it was for the cameras). We got some great ideas from this blog post over at churchstagedesignideas.com on how to build our stage riser for a low cost – Because if there is one group of people that makes awesome stages at low cost, it’s small churches.
With the lighting and staging in place, once we placed our cameras in their designated location both with 135mm Canon cine glass mounted with a Metabones EF to E mount adapter (we used these lenses because they have a focus ring to accommodate a follow focus for pulling focus remotely and the lens unit doesn’t shift as you pull focus allowing it to not throw the Ronin off balance), there was no additional effort needed to get the image to look great. Cellphone pictures from that day looked just as amazing as the footage from our cameras did, which made everyone feel happy.
First spend time on testing and figuring out what lighting you want on camera. Shadows are key! Next figure out what you want the background to be, how it will compliment your lighting, and how it will compliment your event. Make sure you have plenty of distance from the speakers and the background and then that’s it, your event will feel professional and your image will look amazing regardless of what your camera budget is.
PRINCIPLE FOUR: Know your equipment, know your setup, and have a very organized plan
As we have progressed to bigger and bigger projects we have come to realize more than ever that planning is really where great videos are made. What is the difference between a B-movie and a Hollywood feature? Room to plan for every detail. So how can you plan for a live event? Know what the presenters or subjects will be doing (i.e. using whiteboards, having a dance, jumping off the stage, and anything that would require lighting alteration or camera movement), but other than that your planning for the “in the moment” occurrences of the event are pretty limited. When it comes to the equipment side, that is where the real planning is needed.
Looking back, and having moved on to film many more live events, there is one major mistake we made during this event that almost cost us the whole shebang, but we will get to that at the end of this section. First, if renting equipment, make sure you have at least 1 full day to get to know the equipment in and out. When something goes wrong during the event – which something will – the better you know your equipment the more precisely you will be able to troubleshoot. 
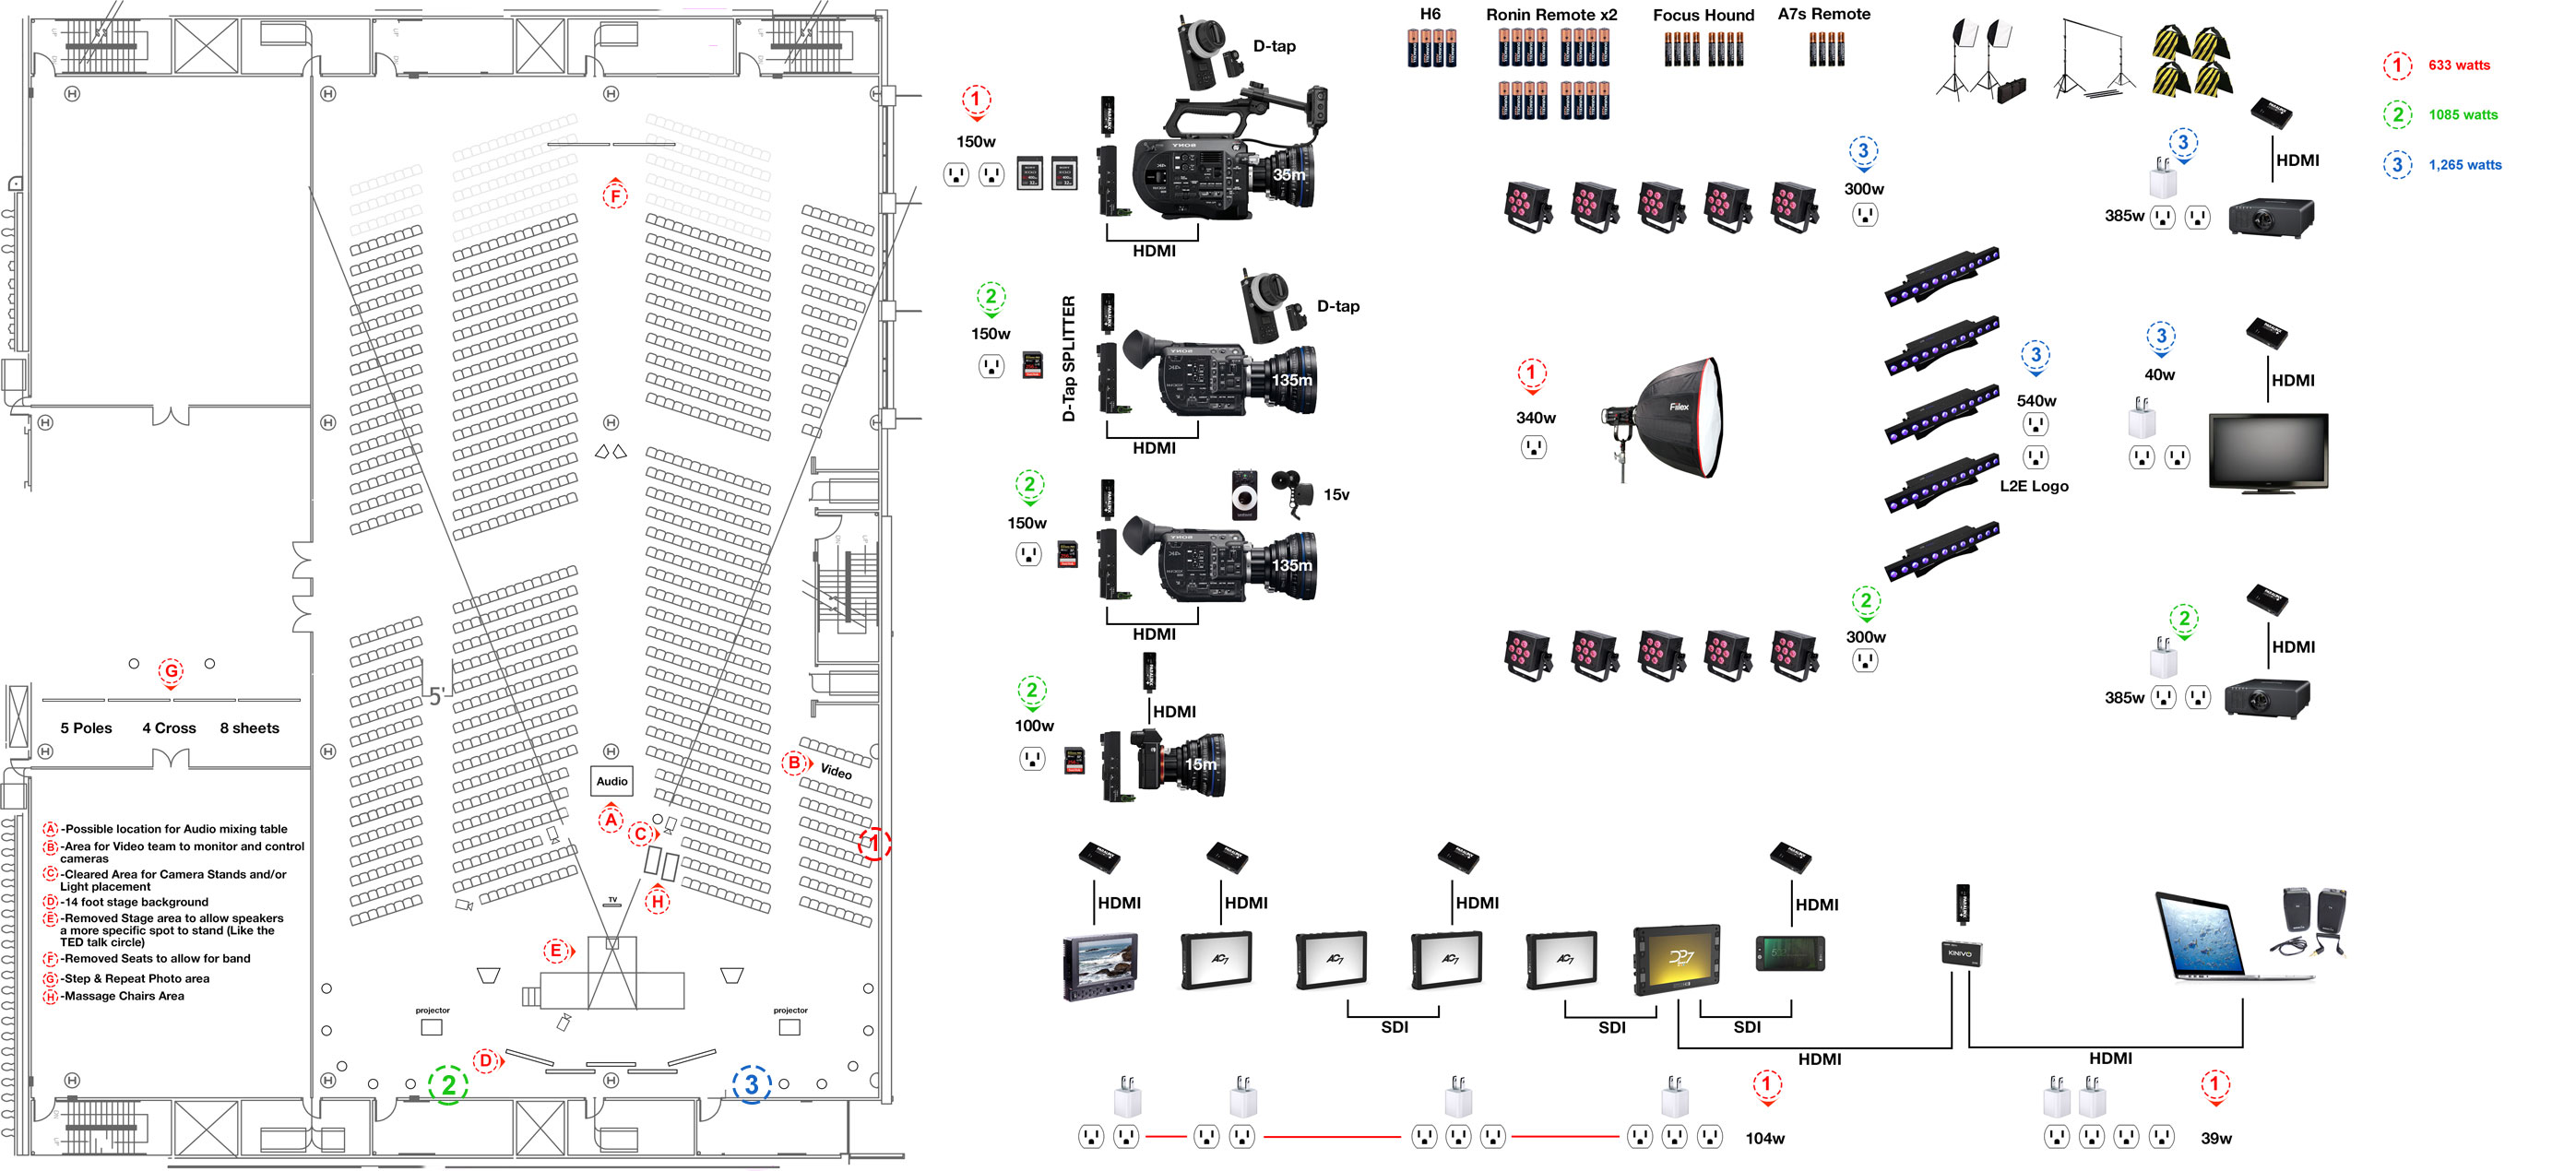
Next have a pre-setup map of your equipment, the seating, lighting, and make sure all other parties are on the same page. This step seems like a lot of extra legwork, but honestly, the extra hours we put into mapping everything out and communicating it easily paid for itself in not wasting time figuring out why the stage is on the completely wrong side of the room or any other crazy problem that tends to arise from miscommunications. As part of the pre-setup map we encourage you to know your wattage. In this event, we had to pay for outlet usage so it was a necessity, but in events after this, we still take the time to map out our electrical load. Why? because it’s not fun to learn that you can’t really use all the lights you just set up because you’ve overloaded the circuit. Simply put, your house plug is a 15amp circuit with 120V (15A x 120V) = 1800 watts. We don’t hesitate to ask the event center, and most will know, which wall sockets are on which circuits. That way we can distribute the power load and make sure that circuits don’t have more than 1800 watts on them. Click here to see the pre-setup map we used for L2E 2016.
So now, what was the BIG mistake? I left myself as the only one who knew how to set up all the equipment, making what could have been a 4-hour setup with 3 of my crew into a 13-hour setup of tears. I as the director of the live setup/recording failed huge at this. I understand technical things much easier than most people, and because of that the setup process made sense in my head, but I failed to teach the crew how they could help me. The result was me setting things up and trying to teach our awesome creatively minded crew how they could “kind of” help with this technical setup. There wasn’t enough time, and at the start of filming, we had only 2 of the 4 cameras working for the first 1/3 of the presentations. But thanks to my awesome crew, half of them were able to take control of running the show while myself and another finished the setup as secretively as possible.
Our takeaway from this has increased productivity not only on live sets but for every commercial, creative, and life project we have done since. ASSIGN SETUP GROUPS: We designate a team of 2 to setup an isolated group of equipment. They learn how to setup, run, troubleshoot, and then take down that section of equipment, and for that event, that is their focus. Take the time to save time.
Have all equipment needed for the event there at least 1 day before the setup day, set up all the equipment on location the day before the event. Create setup groups and have them practice completely setting up, running, troubleshooting, and taking down the equipment multiple times. And before you even push the “check out” button for your rental place, make sure you have communicated your setup locations, needs, and power consumption with the rest of the event team.
Well, we hope that helps
when you embark on your next live event filming. We know there is so much more that we could have gone into detail about,but we didn’t. You are a brilliant creative person, and we know that if you can apply these 4 principles in your own way, you will rock the socks of your client and instead of hating you, they will love you. And they may even hire you again, and again, and again, and again, and…..
Resources:
-Here is a great tutorial that covers some additional ways to plan for your live event 10 tips for shooting a live event.
-We rent the majority of our equipment from LensRentals.com and have loved their service.
-Here is a short clip of one the final presentations our team filmed at L2E 2016 (This clip has been branded under our sister company ModernBroadcast)
COMV is a participant in the Amazon Services LLC Associates Program, an affiliate advertising program designed to provide a means for sites to earn advertising fees by advertising and linking to Amazon.com.
